Pages

Showing posts with label Glitter. Show all posts

Saturday, 25 January 2014

Burns' Night Nail Art/BPS Striping Tape Review

Hi friends! Just a quick post from me tonight - some Scottish-y themed nail art for Burns' Night and a wee review of this striping tape from Born Pretty Store. (Discount code at the bottom of the post, too!)


Thursday, 12 September 2013

Seventeen Cameo Crush Textured Polish | Swatch & Review

Hiiii! I know, I 'don't do' swatch posts...but today I do! 


I had no idea that Boots' own brand Seventeen (or 17, whichever you prefer) was even making textured polishes. I had been planning on picking up one or two of the GOSH ones until I happened to spot these while waiting on a prescription.  Boy, am I glad I did!


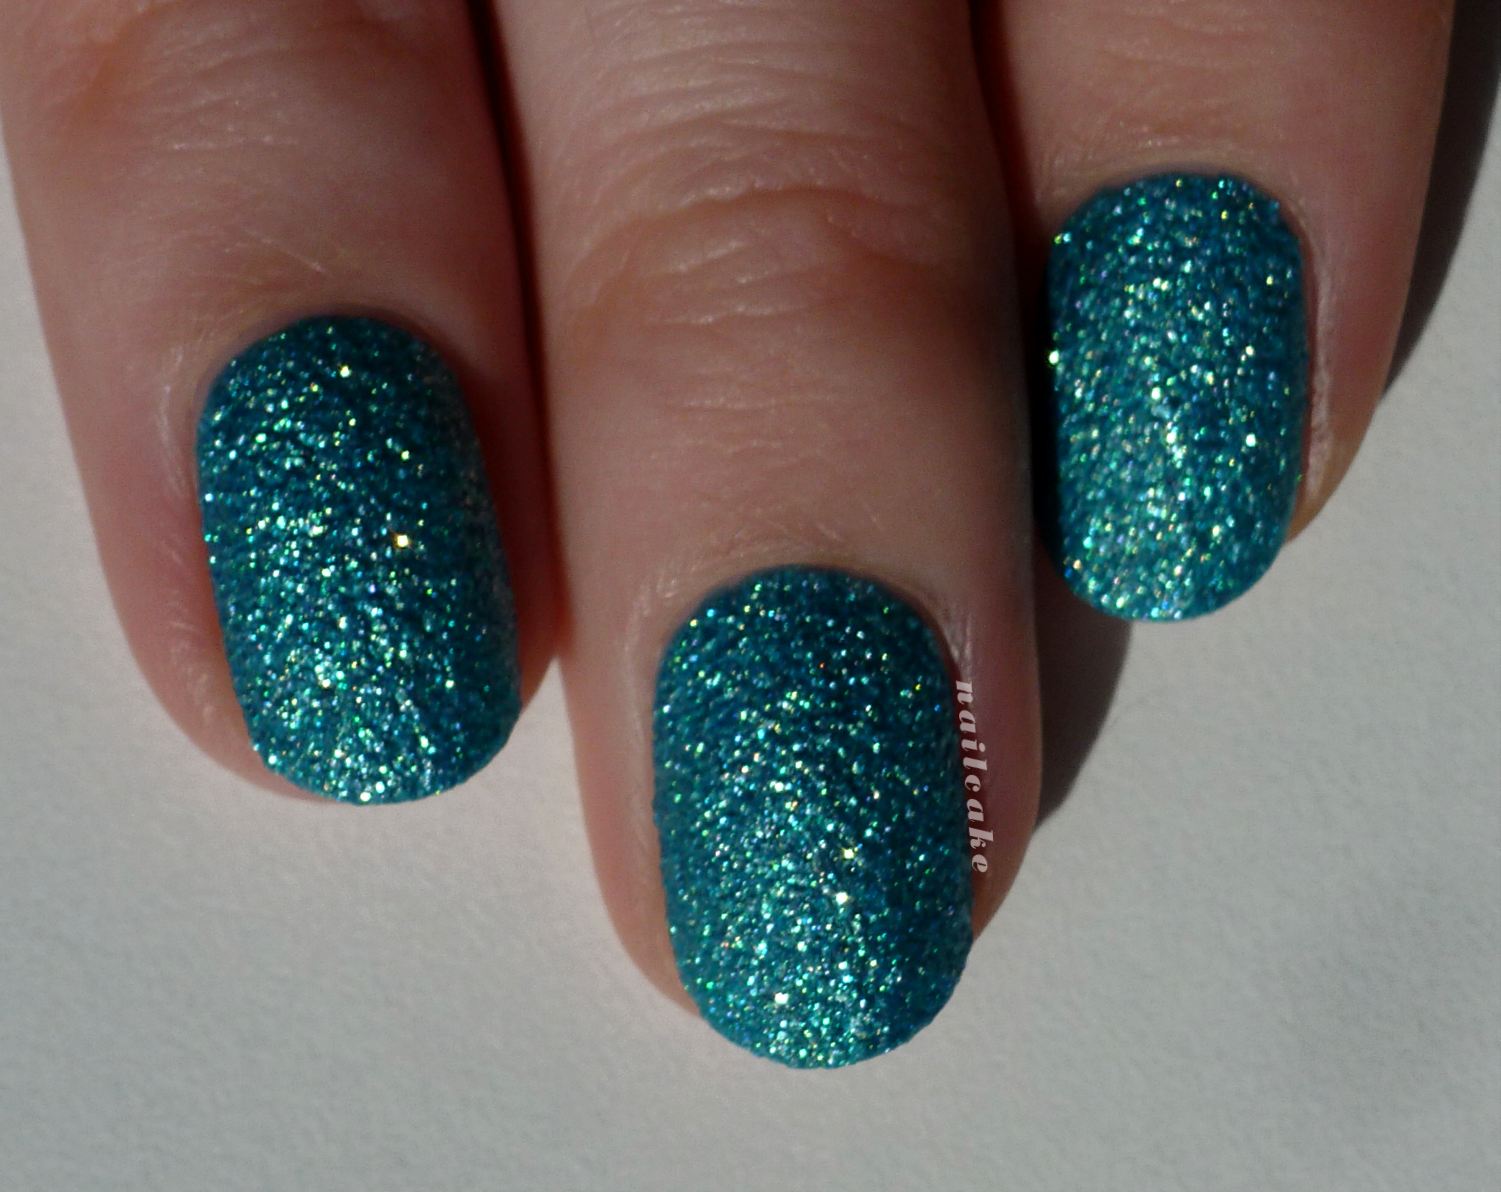
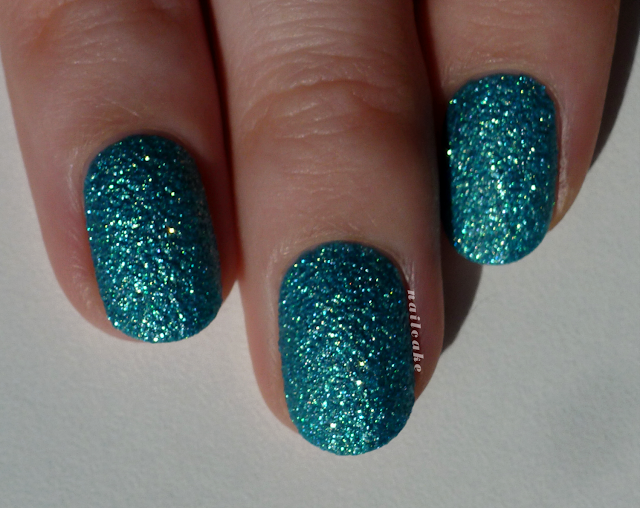
Seventeen Rock Hard Couture Nail Effects in Cameo Crush (mouthful!) is a turquoise-based matte textured polish with an insane quantity of golden sparkle and also (I think) some holographic or at least iridescent sparkle, too. It was impossible to capture the true beauty of Cameo Crush on camera but please trust me when I tell you it's a mega GLITTERBOMB and utterly gorgeous. I'm not entirely au fait with the plethora of textured polishes available, but this one seems unique to me! I can sum up how this polish made me feel in two words: mermaid princess. Seriously.


Formula & Application: Dreamy! It may seem a little thick if you are used to applying very thin coats, presumably due to all the particles in it, but I found it incredibly easy to control. These pictures show two coats and next to no clean-up, even on my 'other' hand - massive bonus! In terms of opacity, you could probably get away with one thick coat, but two definitely looks better - the sparkle is intensified and you get an even distribution of texture. The brush is flat, quite small and nicely pliable - no complaints! 

I waited a good ten or fifteen minutes between my coats. I don't know if that was strictly necessary but it seemed to work well. My second coat tended to be thicker so it could glide over the already-textured nail and seemed to take a little longer to dry. If you haven't used textured polishes before (I hadn't), watching them dry is a fascinating thing. At first stroke, this seems like a fairly ordinary glittery polish, shiny and not textured at all. When it's half-way dry it develops some texture and also a metallic sort of 'sheen' - I was glad it didn't stop there! As it dries down completely, it becomes matte and the texture and sparkle come into their own. The shade also appears a little lighter when dry.


Removal: More difficult than a crème polish, but nothing like an all-out glitter. Really it just requires a little patience. I might consider using foil in the future, at least in part to try to avoid getting glitter particles all over my hands, haha. I had half expected some staining given the colour, but if there was any at all it was minimal and easily removed by a little scrubbing with a nail brush.

Blurry sparkles!


These Rock Hard Couture polishes are priced at £3.99 each and are currently buy one get one half price. The other shades are a gold called 'Charm Bracelet' (which I'm wearing right now) and an iridescent white ('Celestial Pearl' - next on my list) and a pink with gold sparkle ('Bijoux Baby').

Overall, I'm absolutely blown away by this polish. I was a texture-sceptic, but I have been converted! I'm delighted that the British high street has come up with such a high quality alternative to brands which are more difficult and expensive to get hold of in the UK; and in particular that they've produced some original shades. I really hope these polishes get the attention they deserve and that Seventeen makes more colours! I know I'm going to be hassling them to...


So, how was my first swatch post? Did I cover everything you might want to know? Do you love this polish like I do? Please also let me know if you'd be happy to see more swatch posts - it's not something I envision doing a great deal of, but occasionally I come across something I love enough to want to share! 

Monday, 29 July 2013

piCture pOlish Blog Fest 2013

Celebrating the Year of the Blogger!


HIYA POLISHED PALS!  Can you tell I'm excited?!  I'M EXCITED.  I was utterly over the moon when I received the email inviting me to take part in piCture pOlish Blog Fest 2013, not least because I had never had the opportunity to try their polishes before.  For those unfamiliar with Blog Fest, it is an annual event run by PP and involving bloggers from all around the world and this year, Blog Fest is celebrating amazing nail art.  Three lucky participants will also be chosen to create a PP collaboration shade each, for release in 2014.  The voting will take place on PP's special Blog Fest 2013 Pinterest board - if you'd like to see the other entries and take part in the voting, you can find that here: http://pinterest.com/picturepolish/

I was sent these three shades to play with:


Ocean - 'An octopus garden in the shade...'
Ruby Blou - 'Dazzling red, sparkling blue'
Atomic - ' WARNING...totally explosive!'

As you can see, Ocean and Atomic were created by Kelly's Kolors and Samarium's Swatches respectively - I hope I've done their beautiful creations justice!  So without further ado, here is my contribution to Blog Fest 2013!


Ta daaah!  Being so used to working with cremes, I was initially unsure how best to show off these three shades, but I am pleased with how they turned out.   If you'd like to recreate the look, you're in luck, because here is my FIRST EVER TUTORIAL!


1: After applying base coat, paint your base colour - this is three thin coats of Atomic.
2: Using a nail art brush - or the bottle brush, if you're so inclined - paint the shapes of your flowers.*
3: Outline your flowers in black, using a nail art brush or pen, then frame the rest of your nail (which I forgot to take a picture of, oops).  Don't frame the parts where the flowers are!
4: Glitter placement - plop some Ruby Blou on a bit of paper/tin foil and use a toothpick/dotting tool/weapon of choice to pick up individual pieces of glitter and arrange them roughly to form the centres of your flowers.
5: Add top coat & clean up if necessary, and you're done!
*When I used Ruby Blou as a base, I painted the flowers in black and added Atomic over the top afterwards.

The polishes themselves are really beautiful.  Ocean is super sparkly with holo-ish flakes in a turquoise jelly base.  It is quite sheer but the formula is lovely, so it truly isn't a hassle to layer it up.  Ruby Blou is a delightful mix of large and small hex (I think) glitters in red, blue and silver, suspended in a clear base.  Atomic isn't something I would necessarily have thought of as a 'me' colour, but it really is incredibly gorgeous and so complex.  The base is a silvery white shimmery affair, but there are loads of little flakes in there too - I see pink and green and gold reflections and sparkles.  I've included some bottle photos especially to try to capture some of the more complex elements of Ocean and Atomic.


Pretty special, right?  


What do you think?  Are you a piCture pOlish fan?  I'm certainly impressed!  You can find PP's polishes on their website or at one of their worldwide distributors.  If you're in the UK (& perhaps Europe?) you can find piCture pOlish at the wonderful Sally Magpies.  

HAPPY BLOG FEST 2013 EVERYONE!  I can't wait to check out all the other bloggers!

 pOlish On-line Store     Facebook     Twitter     Pinterest     Instagram


EDIT: Now you can check out some of the other BlogFesters' posts below and add your own, if you haven't already!


Thursday, 30 May 2013

Monochrome Circles + Rhinestones x Nubar Violet Sparkle

I'm back!  I've been suffering from a combo of busyness and bad weather, yeuch.  On to the nails!


I can't think of a remotely catchy name for these?!  What would you call that circular pattern?  Before I talk about how I created this design, I have to tell you how frustrating I found trying to capture Nubar Violet Sparkle on camera.  I've tweaked these photos a little  in an attempt to make them more colour accurate because no matter which settings I used, it appeared far too blue.  Eventually, though, I just had to accept that it would never look as amazing in my photos as it does in person: it is just far more intense and the sparkle is simply mesmerising, often with quite a strong magenta tone, even in relatively low light.  Sorry for gushing, but Violet Sparkle is such a true beauty and I wish you could all see it like I can!


SPARKLES!


For the patterned nails, I started with a base of black (Orly Liquid Vinyl).  Then, using my largest dotting tool, I added dots of white (Essie Blanc).  Getting them all a regular size (and shape, haha) and aligning them all properly was more difficult than I thought it would be - I started on my pinkie and almost abandoned the idea before I'd really begun, haha - but it did get a little easier as I settled into a rhythm.  I went in with the small end of the same dotting tool to add a black dot in the centre of each white dot.  My nails are not exactly the right size/shape to fit on a whole number of dots, but since I wanted the pattern to go right to the edges, I make the very wise decision just to plop the dots right over the the sides of my nails/cuticles and all over my fingers.  Good one.  Cleaning that up was great fun.


Shade picture for the sake of completeness...


While the black dots were still wet, I finished up by placing the purple rhinestones from the 1.5mm version of this wheel from BornPrettyStore.com using the pointy end of an orange stick, moistened by my tongue (creepy).  They look really purple while they're just chilling in the box, but they seemed quite pinky next to Violet Sparkle - which actually complemented the magenta-ness I mentioned earlier and pulled the whole design together rather nicely.  I let them settle briefly then sealed everything with top coat.


I'm really pleased I didn't abandon this idea!  Although the dots were not immaculate the effect I was going for was definitely there and I loved rocking some sparrrkle!  Also, I've just noticed that this matches my blog colours quite neatly, haha.  

What do you think?   Do you like a bit of bling?